Your photos hold memories and the quiet feeling of a moment, and you want them to look just as sharp and true online as they do on your screen.
This simple guide will show you exactly how to export sharp images for Instagram, so they stay crisp and vibrant, just as you intended.
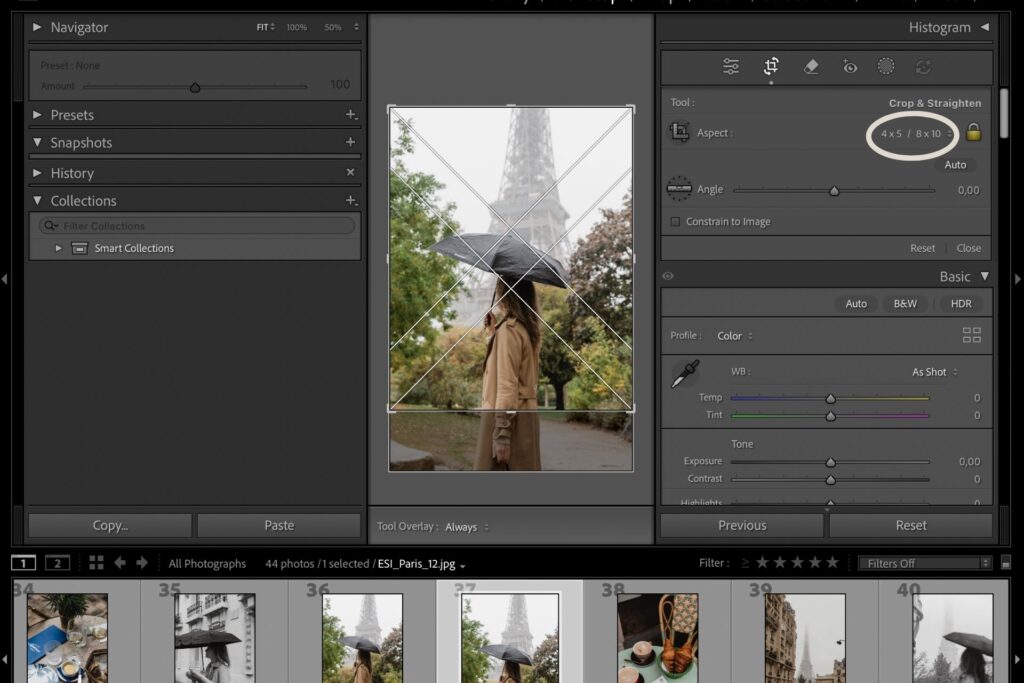
Step One: Aspect Ratio Crop
Instagram’s most generous crop is a 4:5 vertical ratio — tall enough to fill the screen and invite someone to pause. In Lightroom, select the Crop tool and choose 4 x 5 / 8 x 10. This ensures your image won’t be unexpectedly cropped or compressed, and helps keep your photos looking sharp on Instagram.
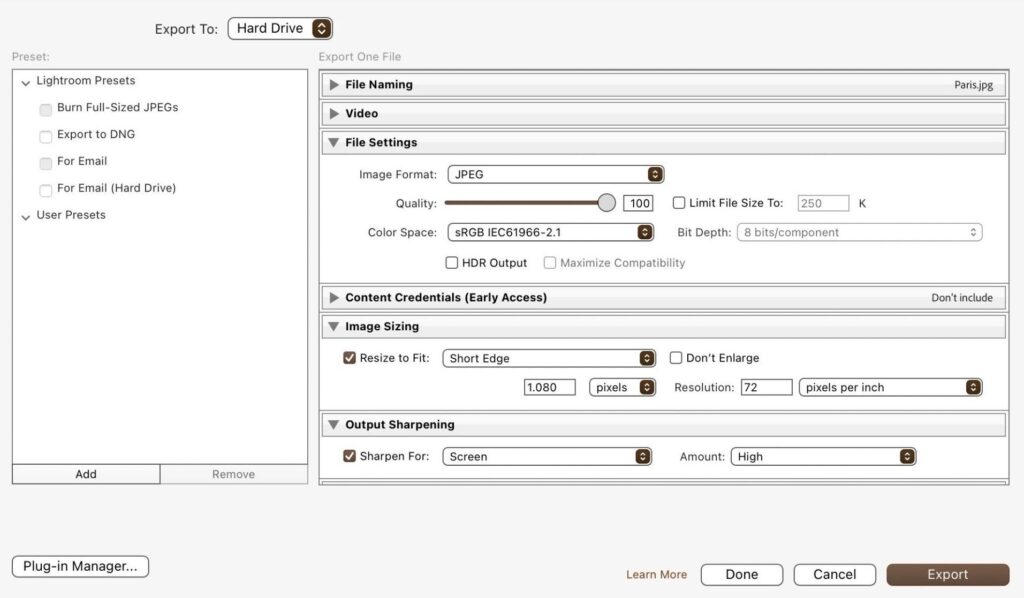
Step Two: Export settings
- Format: JPEG
- Color space: sRGB (to keep colors consistent)
- Quality: 100 (or 80–100 if you want smaller files)
- Resize to fit: Short edge set to 1080 px
- Resolution: 72 ppi (optional; screens rely on pixel dimensions more than ppi)
- Sharpening: For screen — standard or high, depending on your aesthetic
Each of these choices keeps your details safe and your softness intact.
Step Three: Transfer with care
When moving your image to your phone, use AirDrop, Dropbox, or Google Drive. Avoid methods that compress (like email or certain messaging apps).
You pour so much intention into each frame, from composition to editing. Protecting that energy when you share online is an act of reverence — your final love note to the viewer before you release it into the world.
If you’d like to continue refining your visual storytelling, explore my guide on creating a brand moodboard or How to Export Sharp Images for Instagram.
